How to Trim a Video
To make a video compelling, it is essential to trim the video before sharing. If you need a handy tool to create eye-catching videos easily, BeeConverter is your top choice.
BeeConverter features a built-in trimmer to let you cut unnecessary parts of the video clip. Besides that, it also boasts other editing features to keep the audience hooked and get likes. In addition, BeeConverter makes the video creating a piece of cake.
Please read this guide about how to trim a video and make the best use of the BeeConverter.
Let’s start.
Quick Overview of the Steps:
- Step 1. Install BeeConverter on Windows
- Step 2. Import Video File
- Step 3. Trim Video Precisely
- Step 4. Download the Trimmed Video
Step 1. Install BeeConverter on Windows
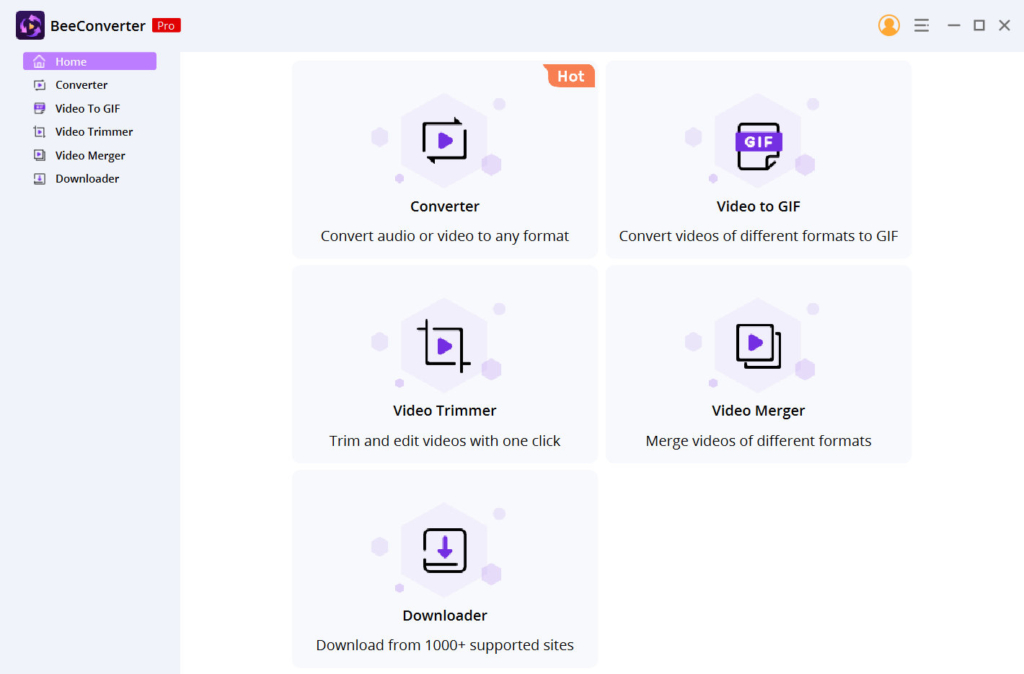
BeeConverter is a versatile video converting and editing tool. You can rely on it to convert video format, shorten video length, crop video size, and merge multiple videos effortlessly.
If you have not yet installed it, please click on the Download button below to install it on Windows. BeeConverter is 100% safe and clean. You won’t’ be bothered by bundleware or ads while using it.
Install it now!
Video Converter
Convert videos to MP4, MOV, MP3, GIF, and more
- for Windows 10/8/7
- for Mac OS X 14+
- for Android
Step 2. Import Video File
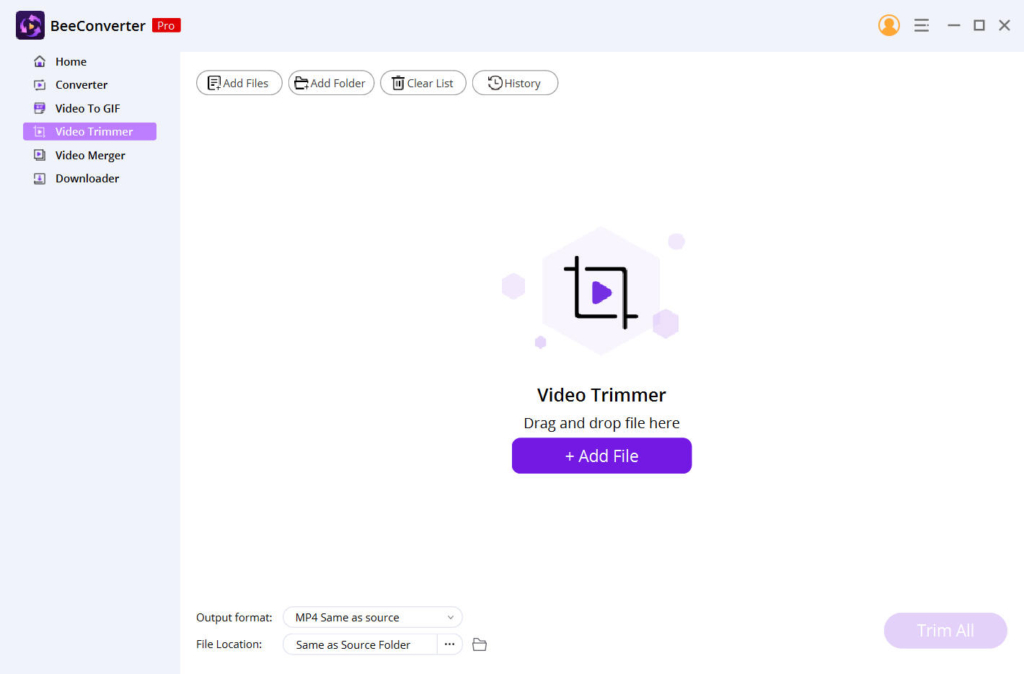
After installation, please launch BeeConverter and go to the Video Trimmer tab.

Then you can import the video by dragging the file to the interface or hitting the Add File button. BeeConverter lets you edit videos in different formats. Hence, you can trim MP4, MOV, MKV, WebM, WMV, FLV, AVI, etc.
If you want to recreate an online video, BeeConverter’s Downloader feature could let you download videos from any website easily.

Step 3. Trim Video Precisely
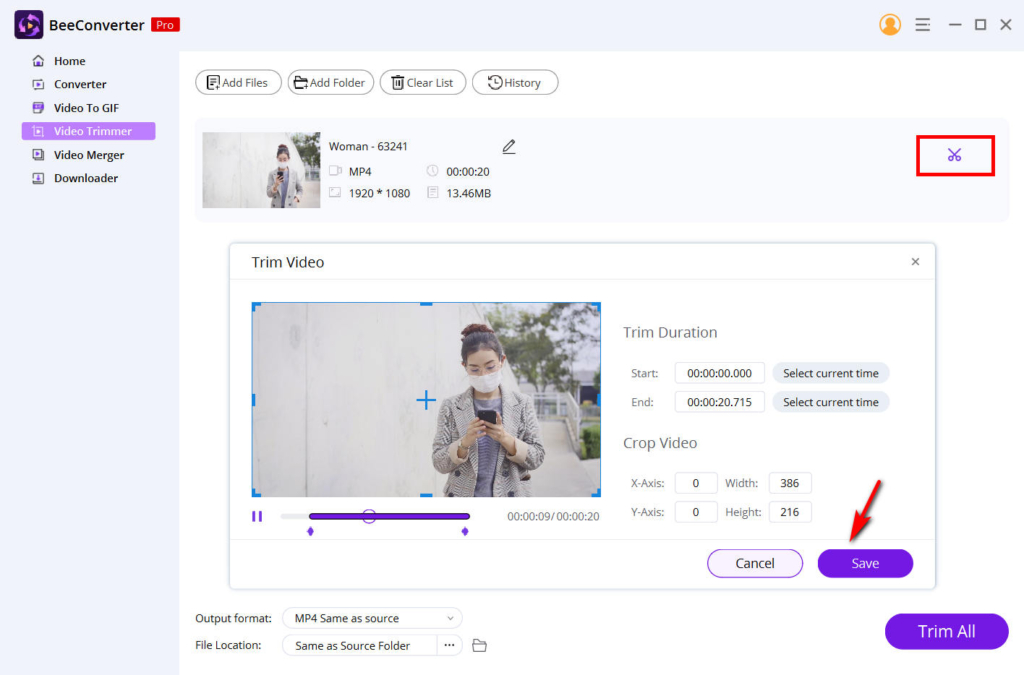
Once the video has been imported, you can find a scissor icon at the top right corner. Hit it, and the editing window will pop up. Now you can edit the video with a trimmer and cropper.
BeeConvereter lets you trim the video accurately by dragging the sliders in the timeline or inserting the exact start/end timing. Furthermore, you can crop out the unnecessary part of the video size. If you are satisfied with the final work, click on the Save button.

Step 4. Download the Trimmed Video
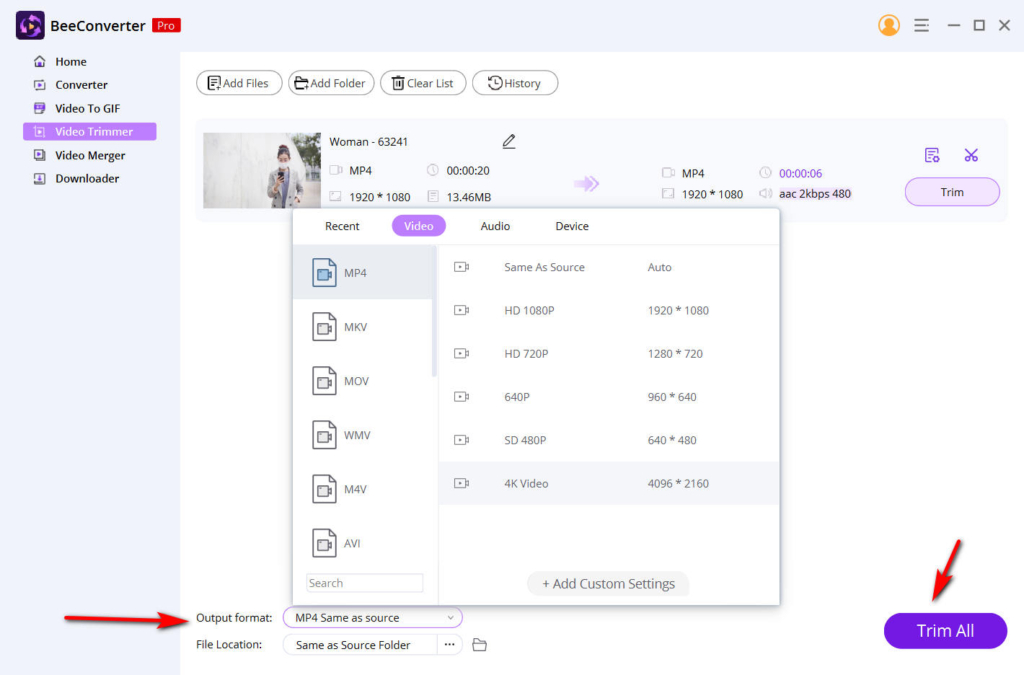
Now that the video has been trimmed, you can hit the Trim All button to save the final works. Yet, before downloading it, you can also decide on the output format and resolution. It is easy to change the video format so that it can meet the streaming platforms’ requirements. In addition, BeeConverter allows you to save the videos in original quality. Of course, you can enhance or reduce the video quality as well.

Conclusion
With the detailed steps above, I bet you already know how to trim a video with BeeConverter.
BeeConverter features a simple yet intuitive UI so that you can edit the video easily. Besides that, its download service helps you grab video content from the internet directly.
Give it a shot now!
Video Converter
Convert videos to MP4, MOV, MP3, GIF, and more
- for Windows 10/8/7
- for Mac OS X 14+
- for Android
Frequently Asked Questions
How do I cut part of a video for free?
1. Run BeeConverter on Windows and upload the video. 2. Hit the scissor icon to open the editing windows. 3. Move the sliders or insert the exact time to select the video part you want to preserve.4. Hit the Save button to save the changes. 5. Click on the Trim button to save the final work.
What is the easiest way to trim a video?
BeeConverter features a simple UI and versatile features to make video editing simplified. You can use it to trim the video without any hassle. Upload the file and hit the scissor icon to open the editing window. Then you can cut the video with the handy tool and download the final work in seconds.