Thanks for choosing our ID3Genius tag editor! Here, we’ll provide you with detailed guide information to help you custome your music metadata with our advanced ID3 tag editor.
Part 1. Get Started
Whether you’re customizing music tags or fixing mislabeled tracks, our powerful ID3Genius tag editor is built to handle it all.
Detailed Installation Guide on Windows/Mac
Before utilizing our ID3 tag editor, you must install it on your computer. Please follow the steps below for a smooth installation process:
Install ID3 Tag Editor on Windows:
- If you haven’t downloaded our desktop program yet, please visit our official site: https://www.amoyshare.com/id3genius/ to download.
- Once the download is complete, double-click the .exe file on the button-left corner to initiate the installation. Perhaps you might need to grant administrator rights to ensure a successful installation.
-
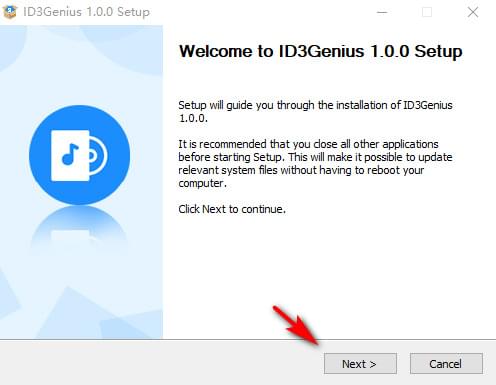
When the installation window pops up, hit "Next" to start it.
-
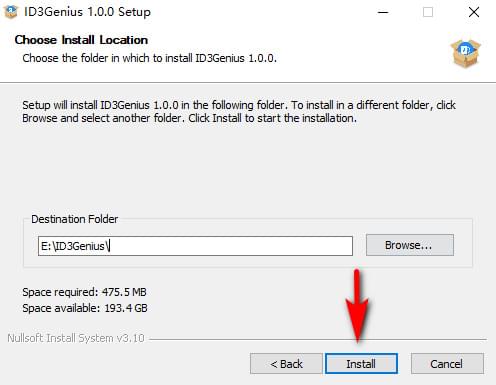
Choose your preferred destination folder. Afterward, click the "Install" button to begin the process. And please wait patiently until the installation is completed.
-
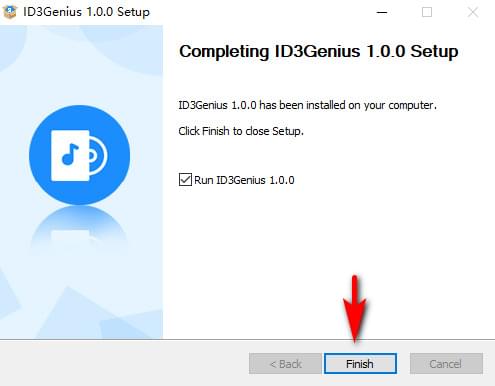
When it is over, you can tick the "Run ID3Genius" option and hit the "Finish" button to start using ID3Genius tag editor instantly.
Install ID3 Tag Editor on Mac:
- After downloading the package, locate the id3genius.dmg file at the bottom left corner of your browser and open it.
- Once the package window appears, drag & drop the icon into your Applications folder. Perhaps, you need to enter the admin password to proceed with the installation.
- If a prompt says, "Are you sure you want to open it?" simply click "Open" to proceed. And the ID3 tag editor software has been successfully installed on your Mac.
Upgrade & Activation Instruction
Once ID3Genius is successfully installed, you’ll find both the "Free Trial" and Pro versions available for editing your music metadata. To unlock advanced features like high-speed metadata editing, batch processing, and full access to album art customization, we highly recommend upgrading to the Pro version. Follow the steps below to upgrade and activate the Pro version with ease:
-
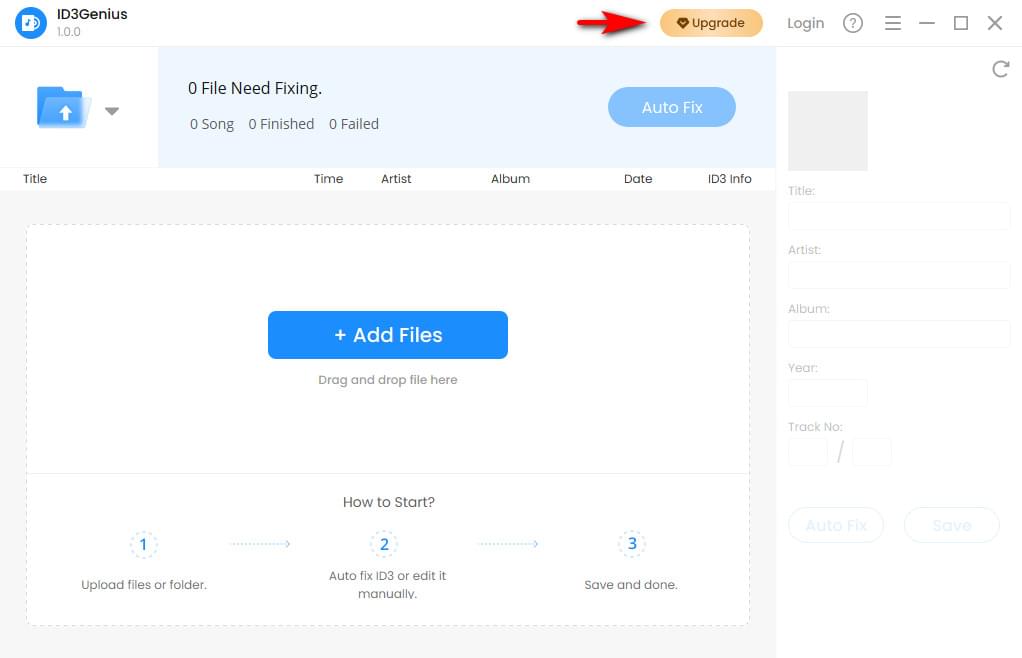
Open our program and click the "Upgrade" button in the top toolbar. You can also visit our price page to purchase directly. Choose the plan that suits you best and click "Buy Now."
-
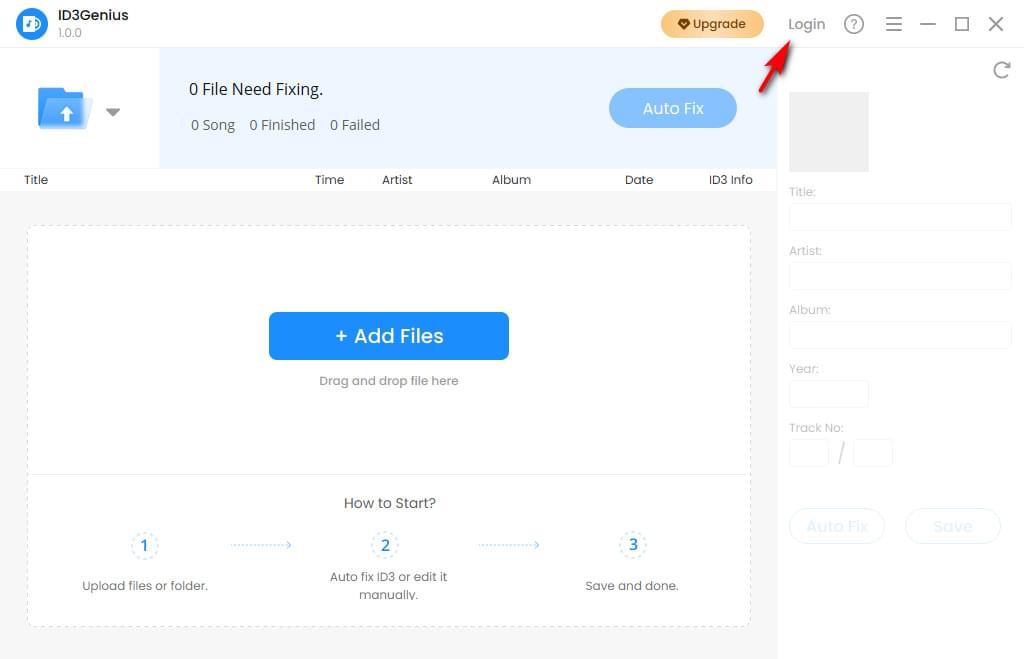
After completing your purchase, return to the ID3Genius program and click the "Login" icon in the top menu bar.
-
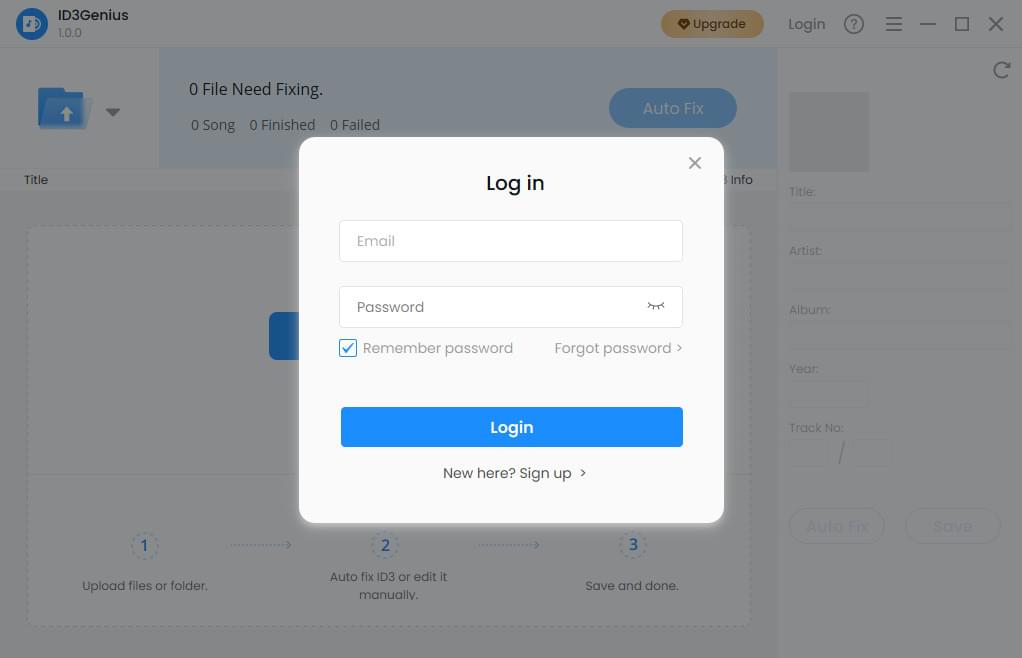
In the pop-up "Login" window, enter the account and password sent to your email, and then click the "Login" button.
In summary, you have activated your account successfully. If you run into any error codes or issues during activation, don’t hesitate to reach out to us at [email protected].
Software Updates
We're constantly working behind the scenes to enhance your ID3Genius experience. From fixing bugs and improving performance to rolling out exciting new features, we strive to bring you the best. To ensure you're always using the latest version, follow the steps below to check for updates:
-
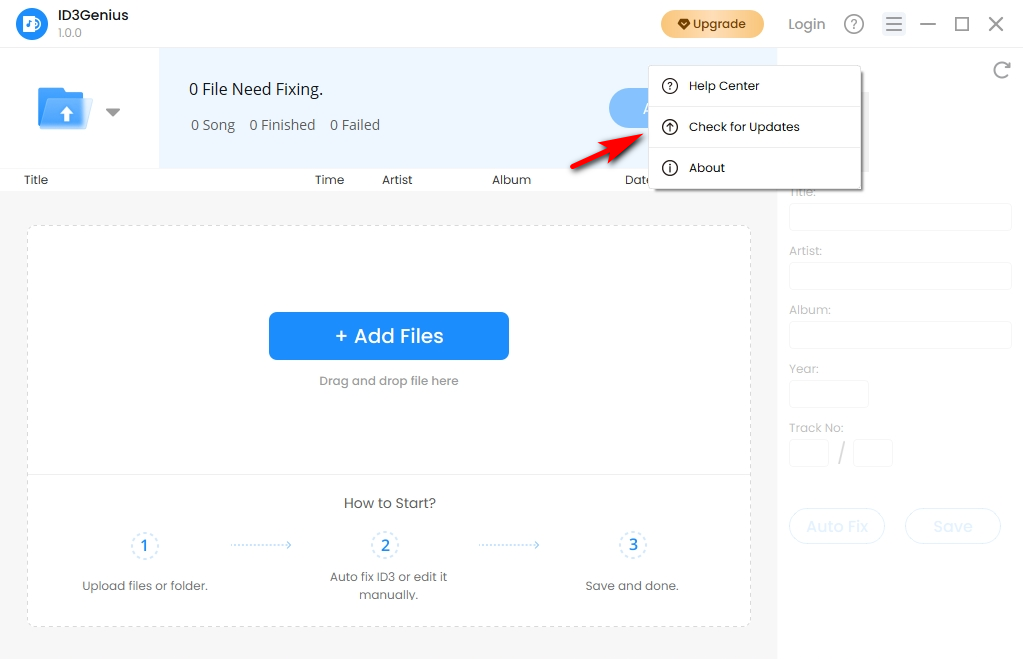
Launch the ID3Genius program and click the three-line menu icon in the upper corner. Select "Check for Updates" from the dropdown menu. The system will automatically check the updates.
- If you already have the latest version, a prompt will appear saying "You’re up to date!" Otherwise, an Update Available" interface will pop up, and you need to click the "Update" button.
- After the update is downloaded, click "Install Now" to apply the latest version right away.
Congratulations, you have updated to the latest version. If you encounter any problems that cannot resolve smoothly during the process, feel free to contact us via email [email protected].
Uninstallation Guide
If you no longer wish to use our ID3 tag editor, you can uninstall it by following these steps:
- Open the Control Panel (on Windows) or navigate to the Applications folder (on macOS).
- Locate ID3Genius in the list of installed programs, then select the option to Uninstall or Move to Trash.
- Follow the on-screen instructions provided by your system to complete the uninstallation.
Part 2. How-Tos
How to Edit ID3 Tags?
Whether you’re looking to fix missing metadata or explore advanced tag editing features, our step-by-step “How-To” guides will walk you through everything you need.
-
Upload Your File
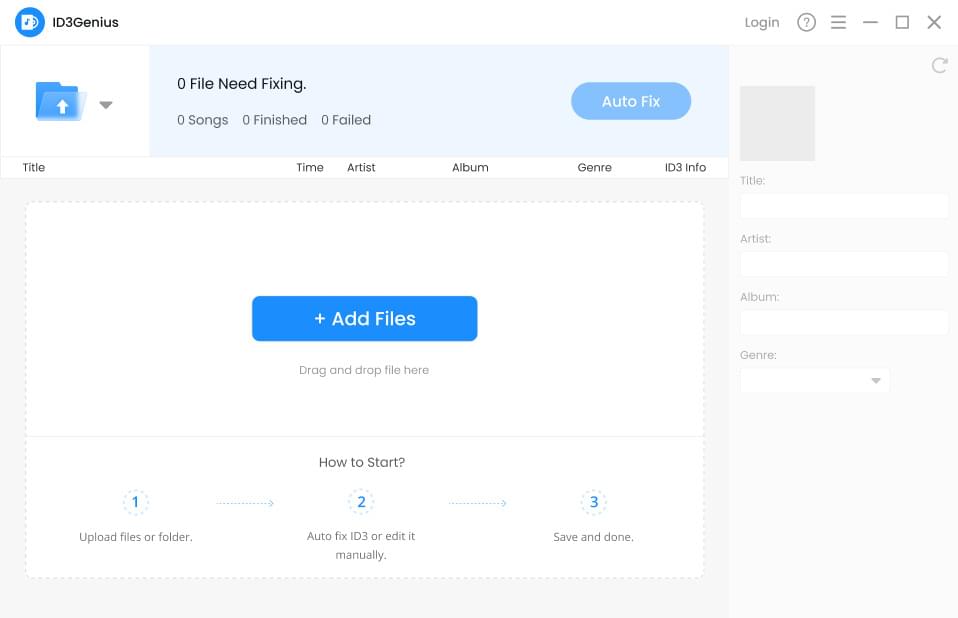
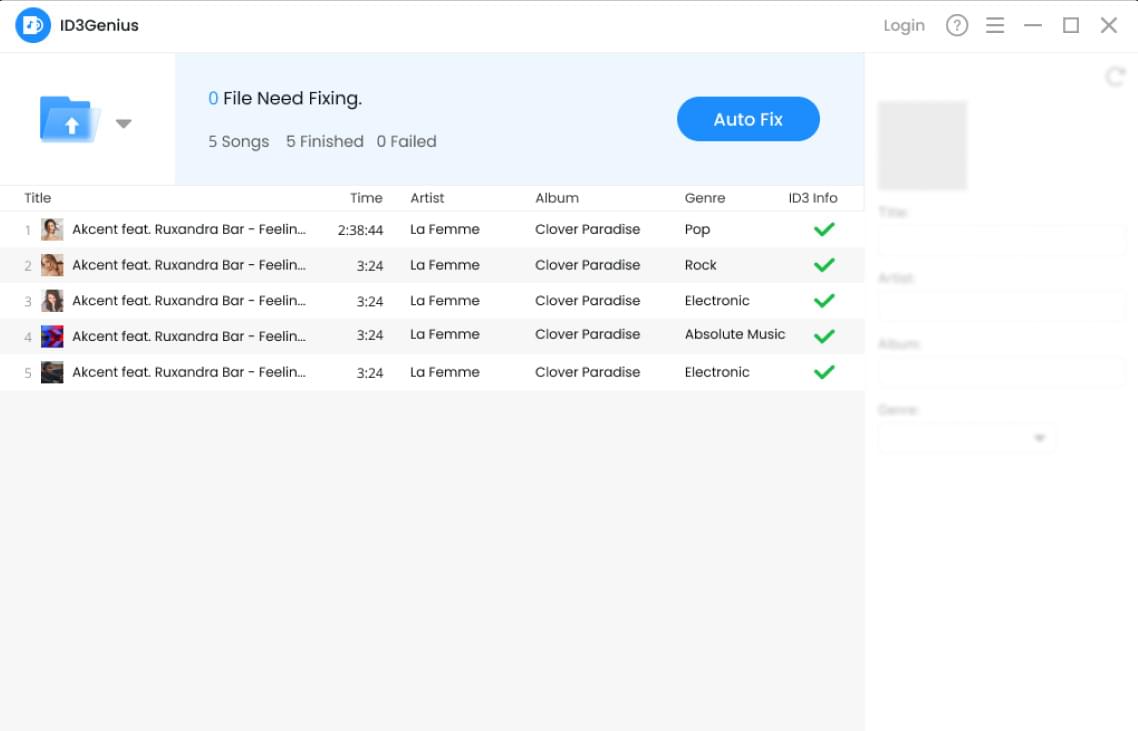
Click the "Add File" button to select and upload files, or simply drag the files into the upload box. You can choose to import a single file or an entire folder.
-
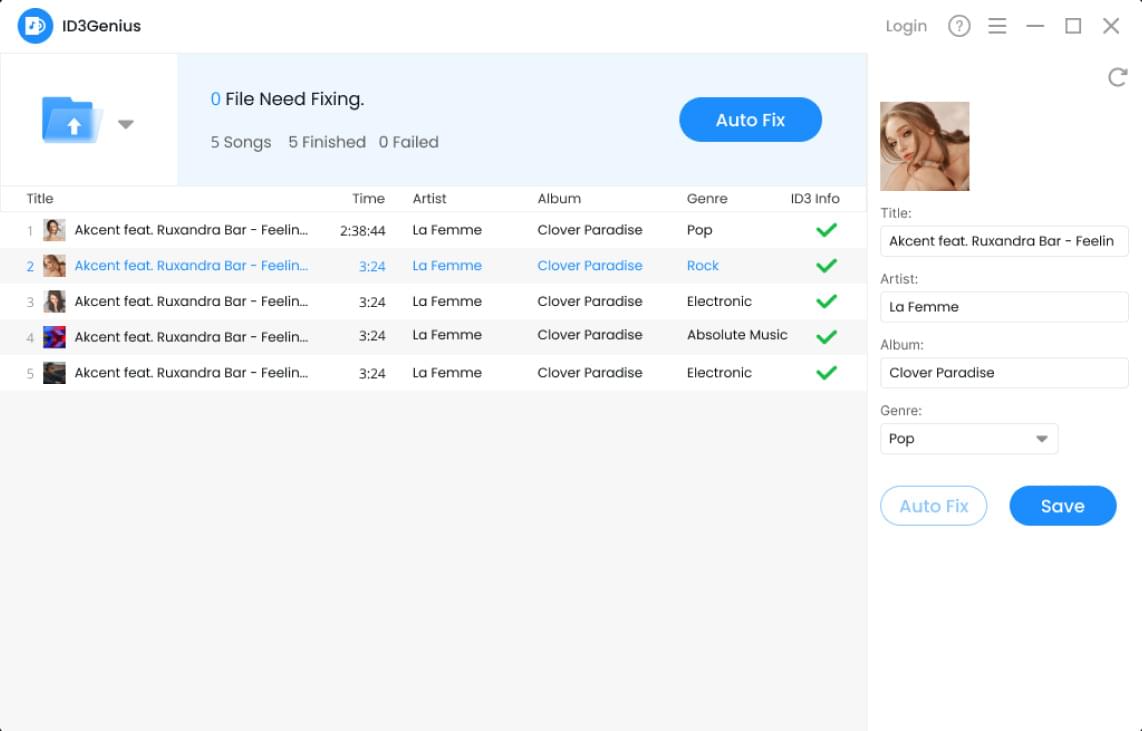
Edit Metadata
After upload, the ID3 tag editor will automatically match the metadata in bulk. You can select any file to edit tags (title, artist, cover art, etc.) in the right panel.
-
Save Changes
After upload, the ID3 tag editor will automatically match the metadata in bulk. You can select any file to edit tags (title, artist, cover art, etc.) in the right panel.
Quick Navigation:
 Get Started