Have you ever suffered the problem that some large files run out of your space on your Mac? Sometimes, these files are HD or 4K videos stored on your hard drive.
Besides, when you want to share your MP4 with your friends online, the speed will become too slow to transfer.
So, you try the best to search for mp4 compressors to reduce mp4 file size. After video compression, you can easily share videos on the internet and free up more storage space.
In this article, I will recommend 5 remarkable tools for you to compress MP4 on Mac. Each of them is straightforward to use. So come and follow me now! You will know how to compress an mp4 file on Mac instantly!
Best MP4 Compressor on Mac – Video Converter Ultimate
Nowadays, a vast library of desktop software and online compressors are out there for you to compress MP4 on Mac. Here I will share with you one of the best MP4 compressors on Mac to reduce file size quickly and easily!
AmoyShare Video Converter Ultimate is a program which lets you compress MP4 without losing quality on Mac. Due to its friendly interface, you can get video compression effortlessly. Apart from compressing, you can use many built-in tools directly to suit your individual need—for instance, watermark remover, video trimmer, merger, and more.
Besides, this program supports batch compression. Therefore, you can add more than one MP4 file to compress simultaneously! At the same time, it is compatible with Mac and Windows.
Here I will introduce how to compress video files on Mac without losing quality to you. Let us get started!
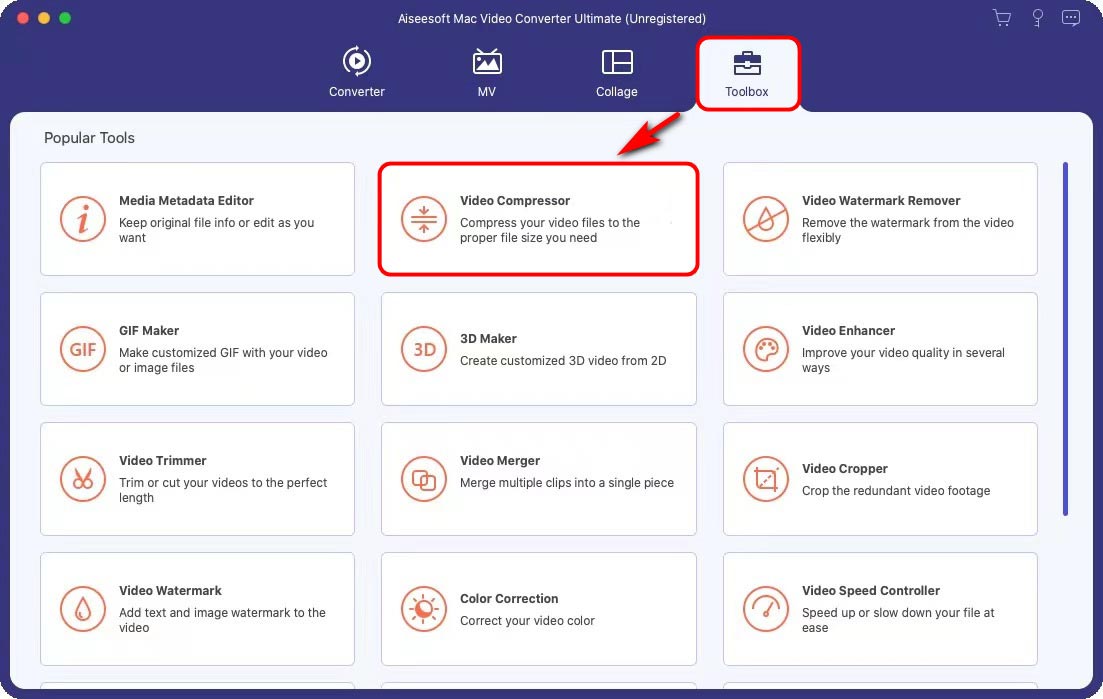
- Launch the Video Converter Ultimate software. And hit the toolbox tab and click on “Video Compressor.” The video compressor widow will pop up.
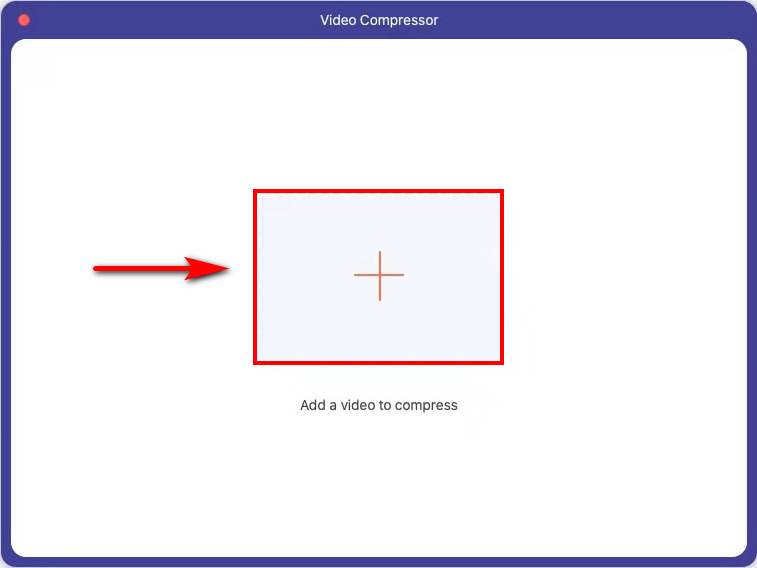
- Click on the plus icon to add a video to compress.
- Shrink the file size and keep the resolution the same as the source. Then, hit the “Compress” button to start the process of compressing automatically.
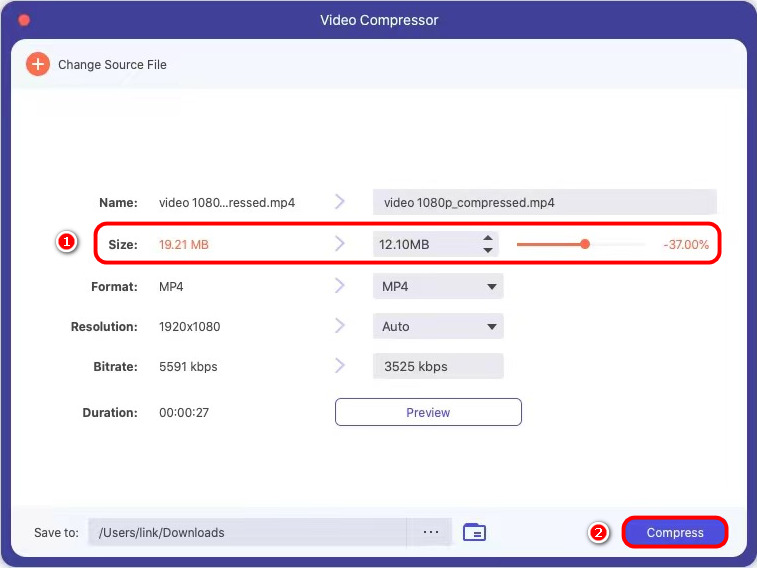
After following these instructions, you have successfully compressed MP4 without losing quality on Mac. It’s pretty easy, so install it and have a try!
Compress MP4 on Mac Online – Online MP4 Converter
If you don’t wish to install the desktop software, there are plenty of websites to shrink MP4 on Mac. You don’t need to register for these tools. AmoyShare Online MP4 Converter is one of the best online tools to compress MP4 on Mac.
Online MP4 Converter helps you fast convert any format to MP4 or convert MP4 to other formats. Besides, you can use this tool to compress video for sharing and storing. Due to its higher compatibility, you can use it on Mac, Windows, Android, and iOS.
Also, it has a concise layout that helps you use it easily. Therefore, come and follow me to get video compression in no time.
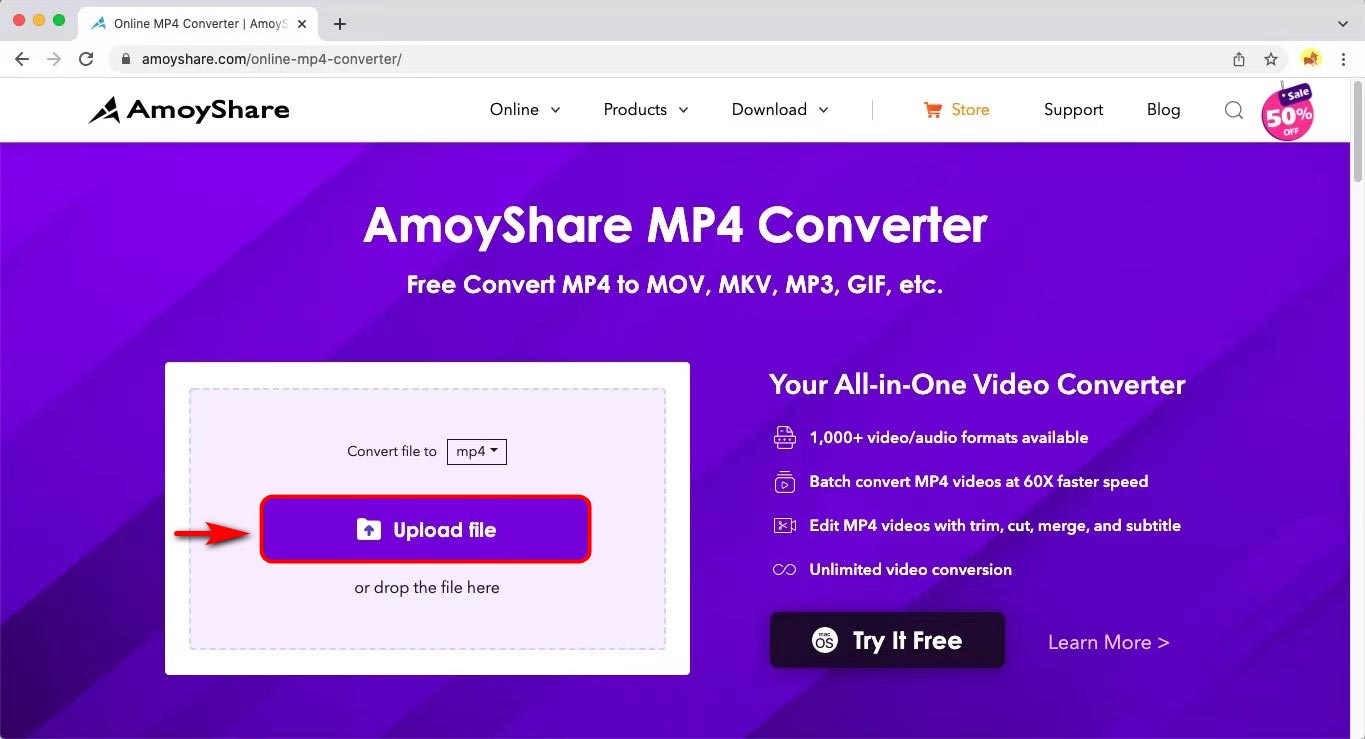
- Head to the Online MP4 Converter to upload the MP4 video or drag it to the compressing box.
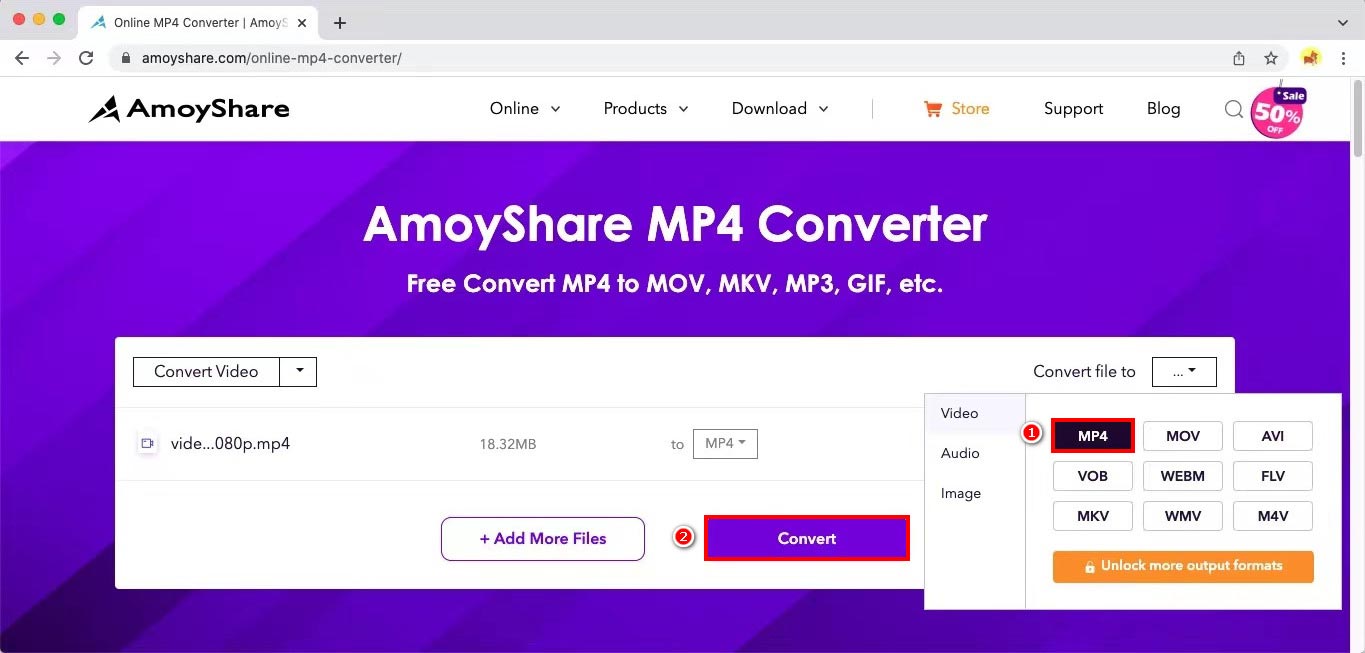
- Set MP4 as your output format and hit the “Convert” button. It will start to compress file automatically.
- Click on the “Download” button. The compressed MP4 will be saved to your default folder.
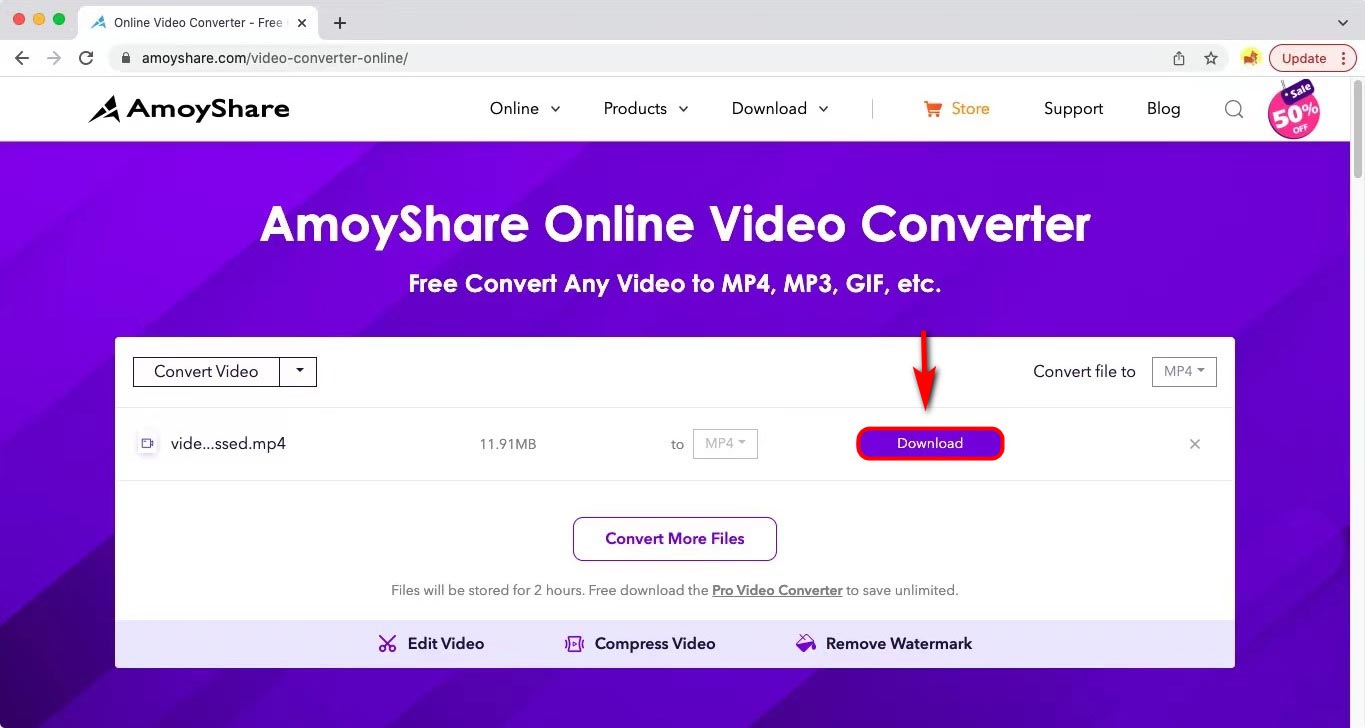
Follow these steps, find the compressed MP4 on your folder to check it. You will be surprised by the reduced file size. Therefore, you can share this small-sized file to any social media quickly and save your storage space.
By the way, if you want to shrink more than one video at one go, you can hit the “Add more file” button to import and compress them simultaneously before clicking on the convert button.
Additionally, AmoyShare Video Editor Online is another great tool when you want to crop some unwanted areas while compressing MP4. It’s worth a try!
Free MP4 Compressor on Mac
Another popular way to compress MP4 on Mac is using some freeware. They provide unlimited service to reduce MP4 file size on Mac for free.
Compress MP4 File on Mac – iMovie
iMovie is Apple’s default app to edit videos for Mac and iOS users. Also, it provides you with the feature that compresses MP4 video on Mac straightforwardly. Moreover, this program is a free compression tool. Therefore, you can shrink your video without spending a dime.
Here are the steps for you to compress video file size step by step.
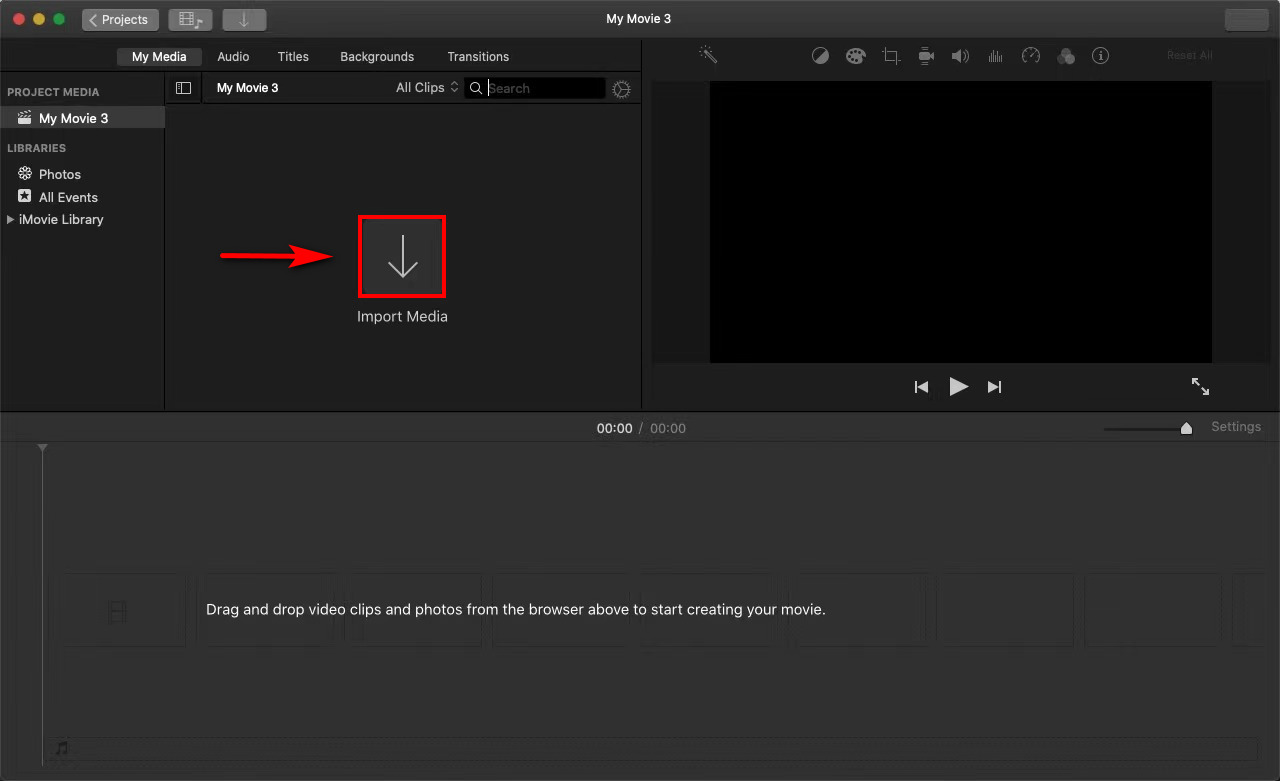
- Run the iMovie app and hit the arrow-down icon for importing media you want to compress.
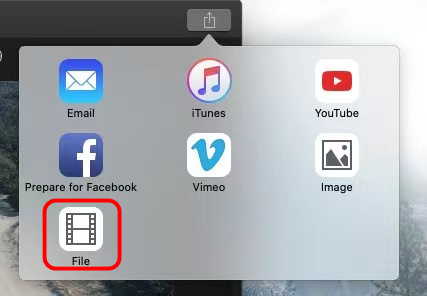
- Click on the “Share” icon at the top right corner. Several options will appear, so click on the “File” icon.
- Adjust the resolution and quality in the lower part of the video to reduce the file size. Then you will find the video size get smaller.
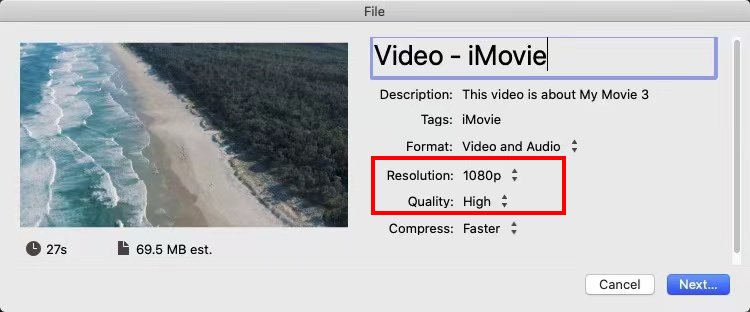
- Hit the “Next” button to rename the file and change the location depending on your need.
- Click on the “Save” button to grab the compressed video.
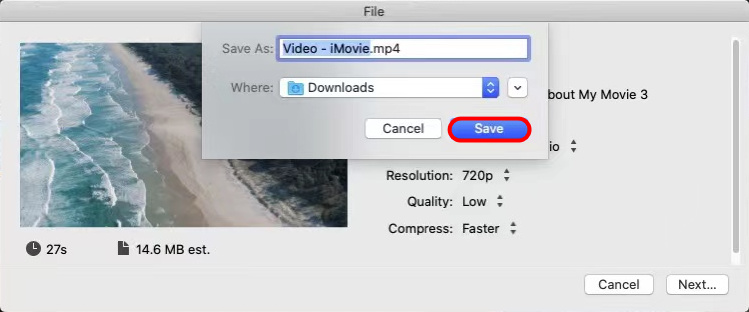
Therefore, you can find this compressed video in your default or custom folder. Sharing it with your friend is not difficult for you.
Compress MP4 on Mac – QuickTime
As a default media player, QuickTime has many essential editing tools for you to create videos on Mac. Moreover, it provides the function of compressing MP4 files for free as well. And no complex step is required. With only two clicks, you can compress MP4 on Mac instantly.
Well, how do I reduce the size of an MP4 file in QuickTime? Please follow me and you’ll know it immediately.
- Launch the QuickTime player and choose the “Open File” option in the drop-down menu of the File module. You have successfully added the MP4 to this player.
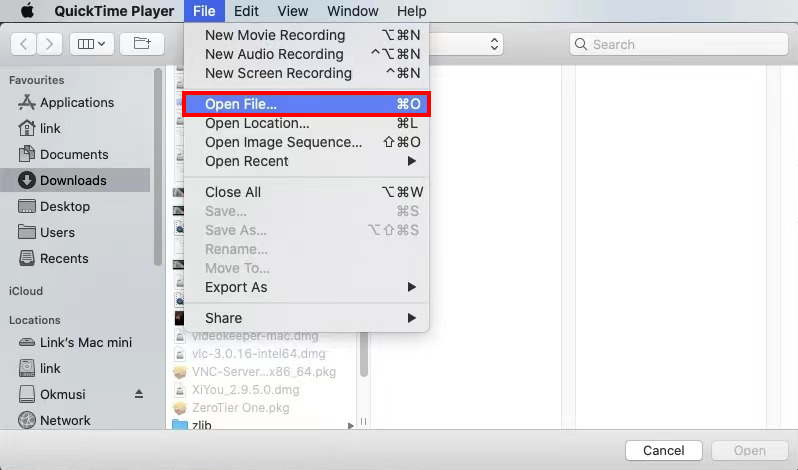
- Hit the “File” module again to select “Export As.”
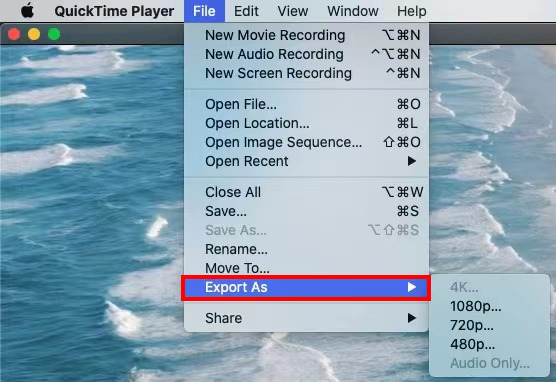
- Choose one quality lower than the original quality. Rename the file and choose one location. Finally, hit the “Save” button.
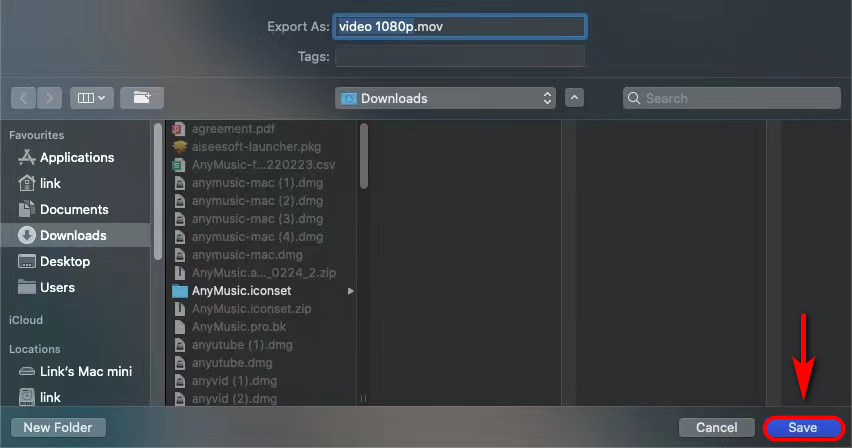
So, you have known how to compress MP4 on Mac via this pre-installed software. Come and have a try now!
Compress MP4 on Mac – HandBrake
HandBrake is another free MP4 compressor on Mac. And the method of compressing is pretty easy as well. So if you have downloaded and installed this program, please follow me to learn how to compress an MP4 file on Mac.
- Open the HandBrake software and click on “Open Source” to upload the MP4 file.
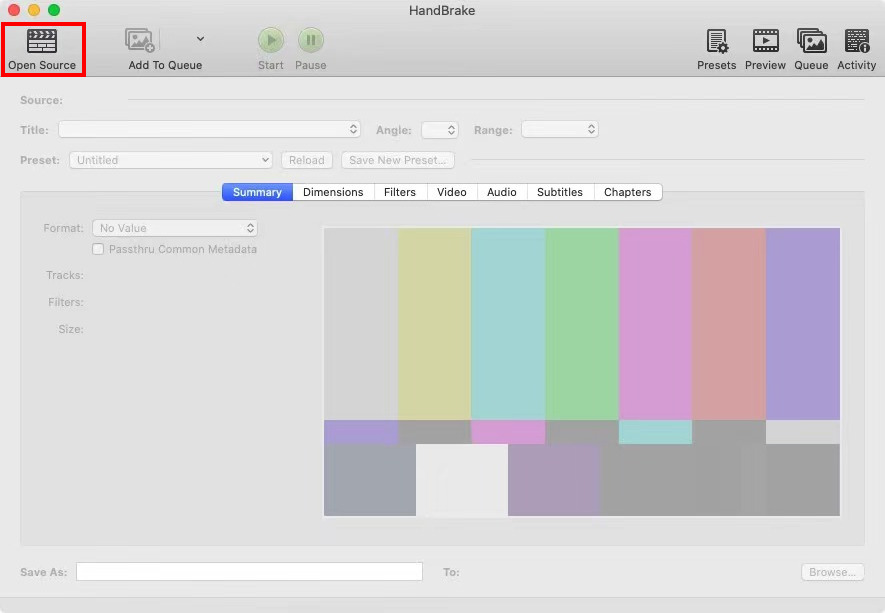
- Choose one quality lower than the default quality on the “Preset” drop-down menu.
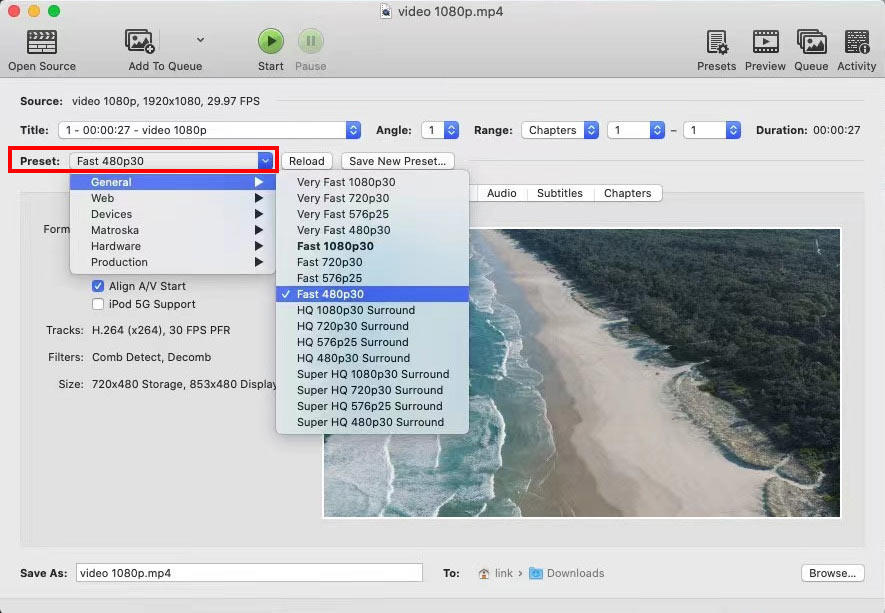
- Rename the file name at the bottom left corner and browse the location to save the file.
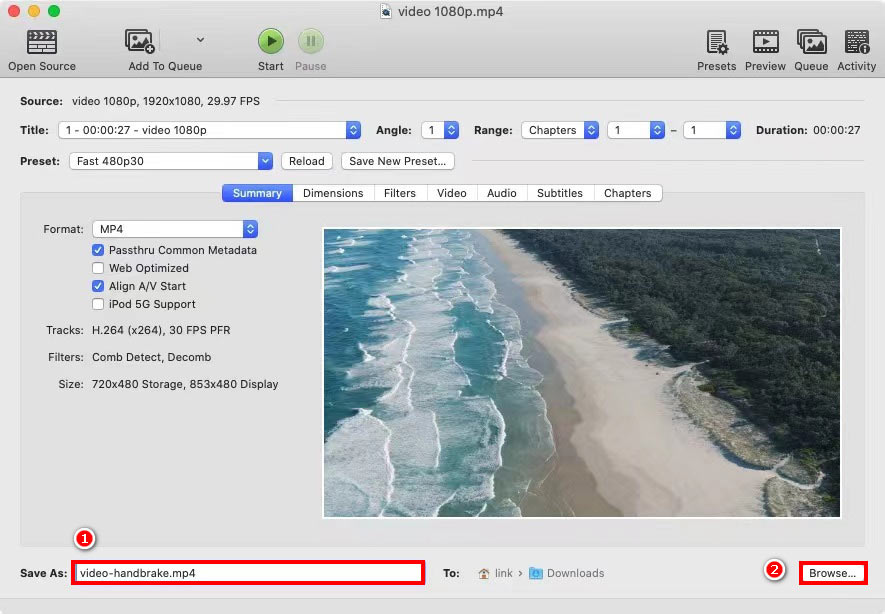
- Hit the “Start” icon at the top of the interface. The MP4 file will be compressed automatically.
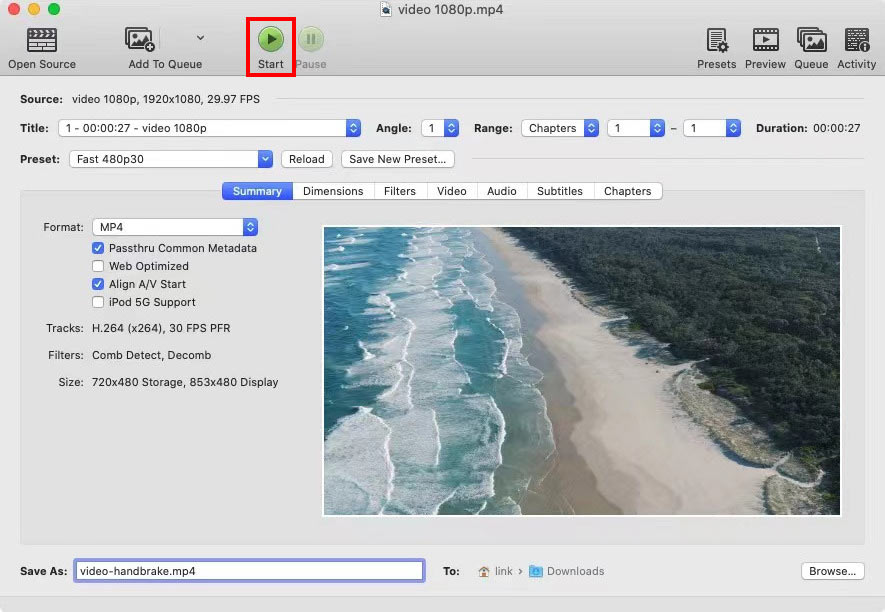
After these procedures, you have effortlessly reduced the MP4 file size on Mac via HandBrake.
If you are interested in this free compressor, give it a try!
Conclusion
All in all, I have recommended you 5 excellent tools to compress MP4 on Mac.
AmoyShare Video Converter Ultimate can compress multiple MP4 files simultaneously. Moreover, its compression speed is 60X faster than other compressors.
AmoyShare Online MP4 Converter has higher compatibility to reduce the file size on any device.
You can use any one of the above methods to satisfy your need. So come and use them now, you won’t be disappointed.
FAQ
How do I reduce the size of an MP4 video?
Many free compressors are provided for you to reduce the size of an MP4 video. For example, you can use the AmoyShare Online MP4 Converter to compress MP4 on any device.
How to make an MP4 file smaller without losing quality?
AmoyShare Video Converter Ultimate is the best compressor to make an MP4 file smaller on Windows or Mac. Moreover, you can compress the file without losing the original quality.First, select Video Compressor on the Toolbox tab, and click on plus icon to add an MP4 file.Then, shrink the file size and hit Compress button.